Your Home’s Fall Checklist


fall-upkeep

Fall means vibrant red, orange, and yellow foliage, lots of pumpkins, and refreshingly cool temperatures. But, it also means winter isn’t far away. Here are a few projects—from looking after the exterior of your home to maintaining your heating system—that can help your home gear up for the cold and save you some cash.

  • Path-lights-by-Outdoor-Lighting-Perspectives-of-MemphisLight the Way With Outdoor Lanterns. Colder days, means less daylight. Add outdoor lanterns or lights to your pathway to have some light when you arrive home. This will also help to enhance the curb appeal of your home, while adding a measure of safety and  security.


  • Remove garden hoses from outdoor faucets and store them in a shed or garage. Leaving hoses attached can cause water to back up in the faucets and in the plumbing pipes just inside your exterior walls. If freezing temps hit, that water could freeze, expand, and crack the faucet or pipes. Make this an early fall priority so a sudden cold snap doesn’t sneak up and cause damage.
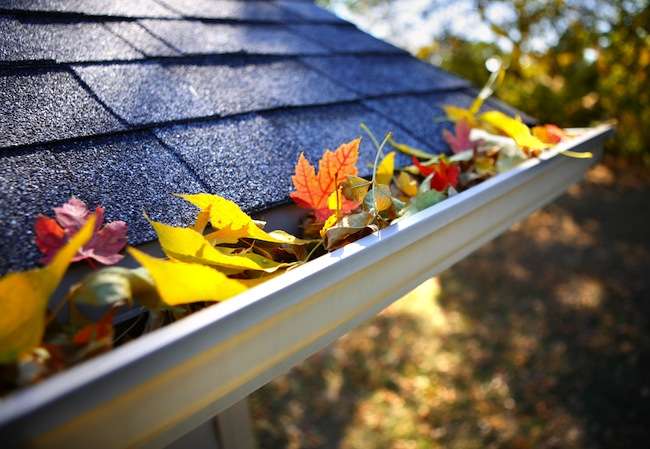
  • 10_Fall_Home_Maintenance_MustsHere’s the chore on everyone’s “least favorite” list: clean your gutters. Clogged rain gutters can cause ice dams, which can lead to expensive repairs in winter. After the leaves have fallen, clean your gutters to remove leaves, twigs, and gunk. Make sure gutters aren’t sagging and trapping water; tighten gutter hangers and downspout brackets if necessary. Annually your roof’s drainage system diverts thousands of gallons of water from your house’s exterior and foundation walls. That’s why it is so important to keep this system flowing smoothly.Your downspouts should extend at least 5 feet away from your house to prevent foundation problems. If they don’t, add downspout extensions (typically about $10 to $20 each).
    *Pro Tip: After cleaning your gutters, cover them with mesh guards to keep debris from collecting again
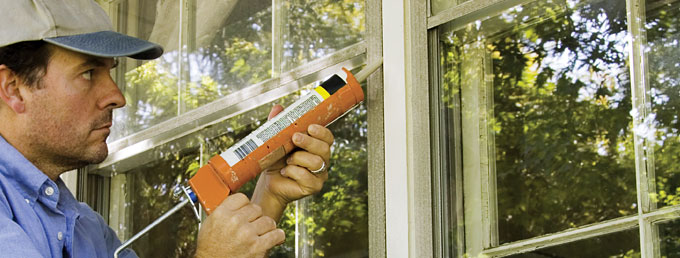
  • Grab a couple of tubes of color-matched exterior caulk and make a journey around  your home’s exterior, sealing up cracks between trim and siding, around window and door frames, and where pipes and wires enter your house. Preventing moisture from getting inside your walls is one of the least expensive — and most important — of your fall maintenance jobs. Gaps in caulk and weather-stripping can account for 10% of your heating bills, according to the U.S. Department of Energy. Because weather stripping can deteriorate over time, it is important to inspect it periodically. To check the efficiency of your weather stripping try this: close a door or window on a strip of paper; if the paper slides easily, it’s not doing its job.

fall-header

  •  Prune plants: Late fall is the best time to prune plants and trees because the summer growth cycle is over. Your goal is to keep limbs and branches at least 3 feet from your house so moisture won’t drip onto roofing and siding, and to prevent damage to your house exterior during high winds.
  • Before the chill sets in, make an appointment for your furnace’s annual checkup. To avoid the last-minute rush, consider scheduling this task in early fall, before the heating season begins. Without this yearly cleaning and inspection, a system can wear itself out quickly, pump deadly carbon monoxide into your home, or simply stop working. Remember to change your furnace filters, too. This is a job you should do every two months anyway, but if you haven’t, now’s the time! You’ll notice a difference in the air quality, and your furnace will run more efficiently. Disposable filters can be vacuumed once before replacement. Foam filters can also be vacuumed, but don’t need to be replaced unless they are damaged (use a soft brush on a vacuum cleaner). If the filter is metal or electrostatic, remove and wash it with a firm water spray.
  • Take steps to repair damaged sidewalks, driveways, and steps before things get icy.  Damaged walkways, drives, and steps are a hazard year round, but the dangers are increased when the weather turns icy. Look for cracks more than 1/8-inch wide, uneven sections, and loose railings on steps. Check for disintegration of asphalt, or washed-out materials on loose-fill paths. Fixing these smaller problems in the fall is also critical to preventing little problems from becoming major future expenses.
  • It’s smart to do a safety check of your home at minimum once per year. Here are some pointers on how to do this. Fires 1.1.11.0 Accordion 2 of 8 
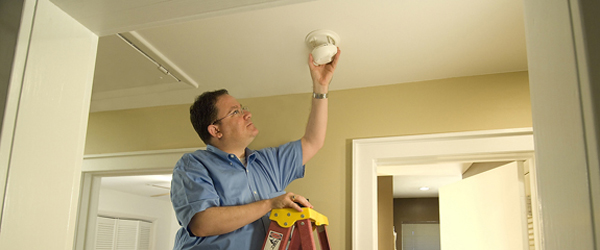
    1. Test smoke and CO monitors. Test the detectors by pressing the test button or holding a smoke source (like a blown-out candle) near the unit. Replace the batteries in each smoke and carbon monoxide detectors if necessary. If you haven’t already, install a smoke detector on every floor of your home, including the basement.
    2. This is also a good time to get the family together for a review of your fire evacuation plan.
    3. Check fire extinguishers. Every home should have at least one fire extinguisher. Annually, check the indicator on the pressure gauge to make sure the extinguisher is charged. Make certain that the lock pin is intact and firmly in place, and check that the discharge nozzle is not clogged. Clean the extinguisher and check it for dents, scratches, and corrosion. Replace if the damage seems severe. Note: Fire extinguishers that are more than six years old should be replaced!
    4. Fire escape plans. Every bedroom, including basement bedrooms, should have two exit paths. Make sure windows aren’t blocked by furniture or other items. Ideally, each upper-floor bedroom should have a rope ladder near the window for emergency exits.

As you’re enjoying the last few weeks of warm weather, make sure that your home is prepared for the coming colder days. Preventative maintenance now will save money on expensive emergency repairs and wasted energy costs. Properly maintaining your home also enhances its value and appeal and is less effort than managing a crisis later.    Taking the steps above will have you & your home ready for the chilly days ahead!
10 Things to Ask Your Contractor or Remodeler Before You Start Your Project

Remodeling or building a new home is a big financial and emotional investment. You’ll probably be seeing quite a lot of your contractor, depending on the size of the project and the amount of subcontracting involved, so it’s important to find someone you can get along with who’ll do the job right. In order to make a solid choice, there are some key questions you should ask potential contractors or remodelers to ensure you’re getting a good match, in addition to protecting your family. This is your home, after all; you want someone who’s dependable and determined to see the project through to the end. Knowing what to expect before the project gets started will help you better prepare for the process. We’ve compiled a list of 10 questions you should always ask your contractor before starting a home remodeling or building project.

2013-12-11 01.01.35
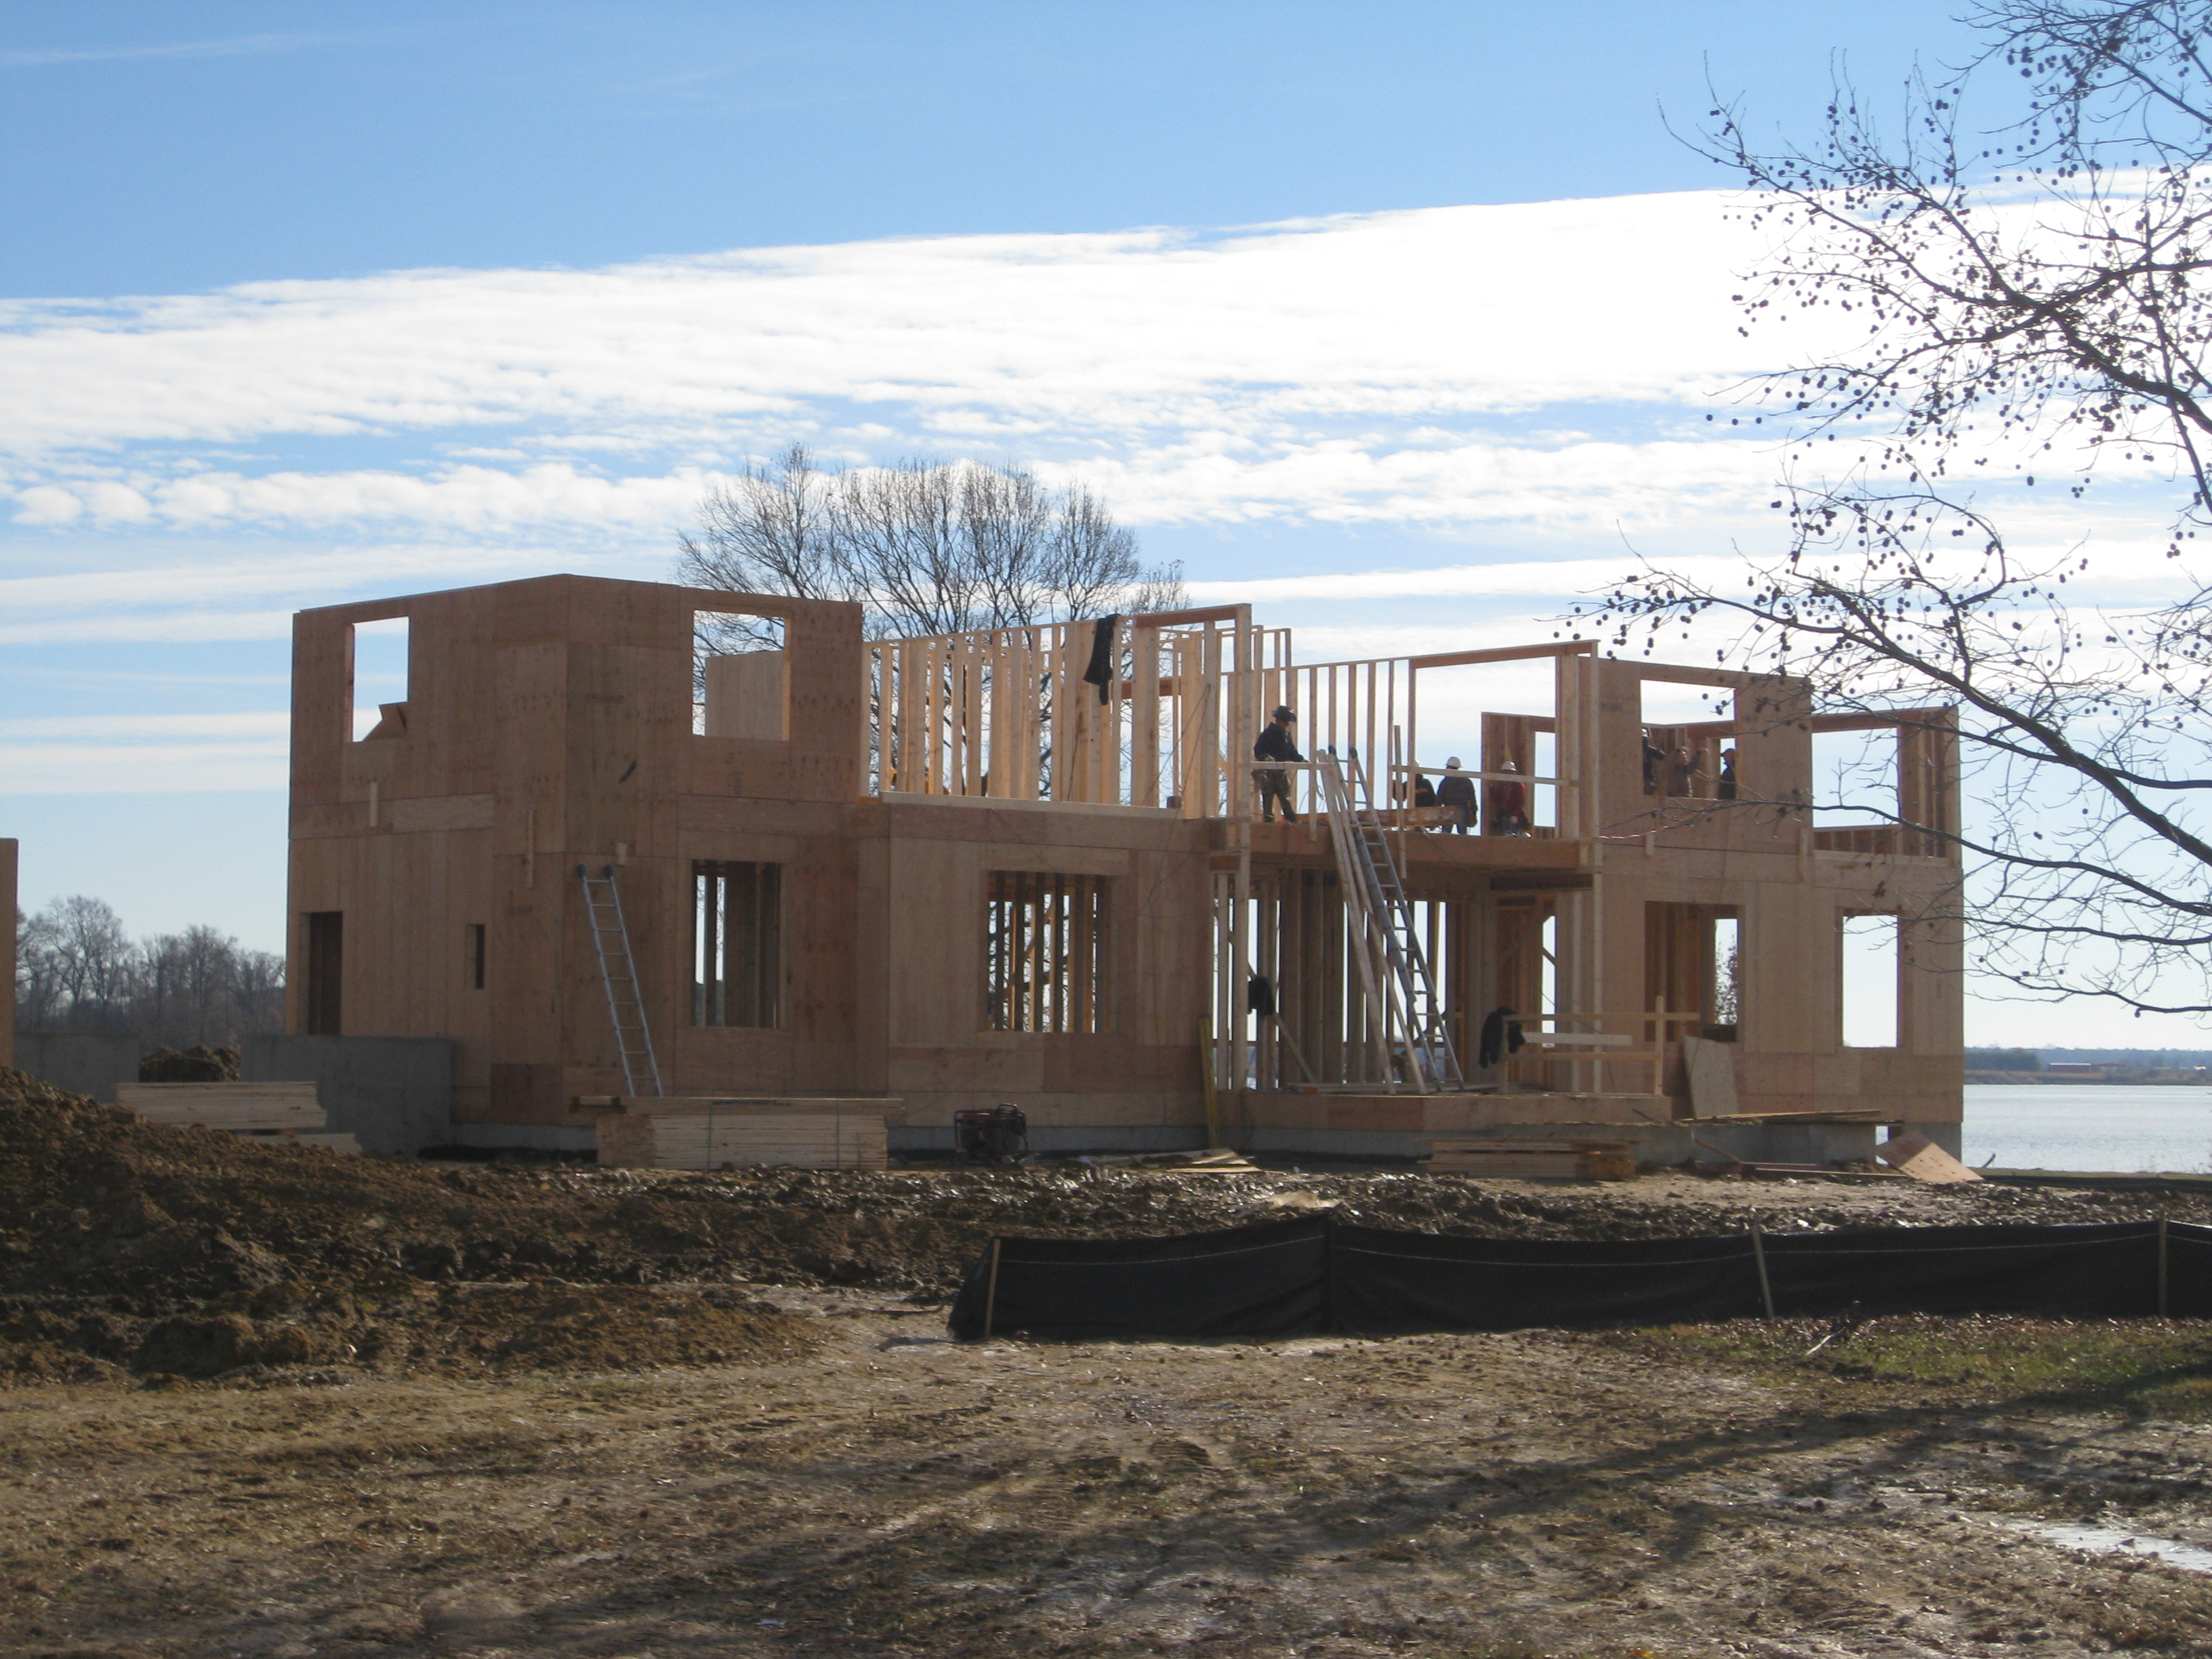
Lundberg Builders Recent Job Site
  1. Are they licensed and can you obtain copies: Maryland requires home improvement contractors/builders to be licensed and all Sales employees to be licensed as well. Lundberg Builders is licensed by MHIC license #11697 and MHBR#749.  Our consultant is also licensed by MHIC #93307. We will be happy to provide you a copy of our license upon request.
  2. Are they insured and can you obtain copies: Maryland requires home improvement contractors/builders to be insured. Lundberg Builders is insured and we will be happy to provide you a copy of our insurance upon request.
  3. How long have they been in business: 50% of small business will go out of business in their first four years. Companies that have been in business for more than 10 years have less risk and more stability. Lundberg Builders has been in business for more than 30 years founded in 1977.
  4. Can they provide you a list of references: Lundberg Builders feels that our references should be given to you as per your specific project, we also feel that while our past clients are our best voice we also respect their privacy. With that in mind we will provide you up to 3 references per your project upon request while also trying to preserve our clients’ time and privacy.
  5. Are they a member of the Local Better Business Bureau: Members of the local BBB adhere to a strict code of business ethics, honesty and integrity. You can research the status of each business thru BBB’s website at bbb.org. Lundberg Builders is an accredited A+ business.
  6. Are they a sole proprietor: Ask yourself, how much risk am I willing to take by hiring a contractor that preforms all the aspects of their business with no other points of contact? What if something happened? Who would fill in? Does the project get finished?  Lundberg Builders provides you with multiple contacts throughout your project. We have eleven carpenters, four project supervisors, and one project manager in the field.  We also have a full office staff and our owner Brad Lundberg is always available to answer questions and address concerns.
  7. Who manages your project: Lundberg Builders has a staff of four project supervisors. Our supervisors are in charge of the day to day operations of your project. Supervisors are required to visit the site daily as well as conduct the coordination of the job.  They are also required to do weekly progress meetings with the clients.
  8. Do they offer any warranty: The state of Maryland requires all home improvement contractors to offer a one year warranty. Lundberg Builders offers this one year warranty, however we feel that this period should be proactive instead of reactive.  Twice during your one year warranty we will conduct a full comprehensive evaluation of your home inside and out.  Any issues we find in this evaluation that pertain to the project will be repaired free of charge.   This service is available after your first year for a fixed fee, should you desire to continue the program.  Any repairs after the first year will be billed accordingly.
  9. Can they provide documentation that they are qualified: Qualification of the trade is not required by the State of Maryland. Outside organizations such as NARI (National Association of the Remodeling Industry) and NAHB (National Association of Home Builders) provide to willing contractors qualification courses to educate them on how to properly build, design and maintain residential homes.  These courses are intensive and require testing to get qualification.   Lundberg Builders has employees on staff and that are certified by these organizations to include Graduate Master Builder, Certified Graduate Remodeler, Certified Kitchen and Bath Remodeler, and Certified Aging in Place Specialist.
  10. How do they screen and hire employees: The old adage good help is hard to find is very true. Lundberg Builders preforms a background check on all of our employees.  We also have an introductory period for our employees, where we place them with our experienced crew and supervisors to identify their strengths and weaknesses.

What’s that Wednesday?

Did you see our back cover ad in the Whats Up Eastern Shore June Issue?

Picture1

If you did you may have been left scratching your head trying to figure out exactly what this was. Well you can rest easy now because we’re here to explain!

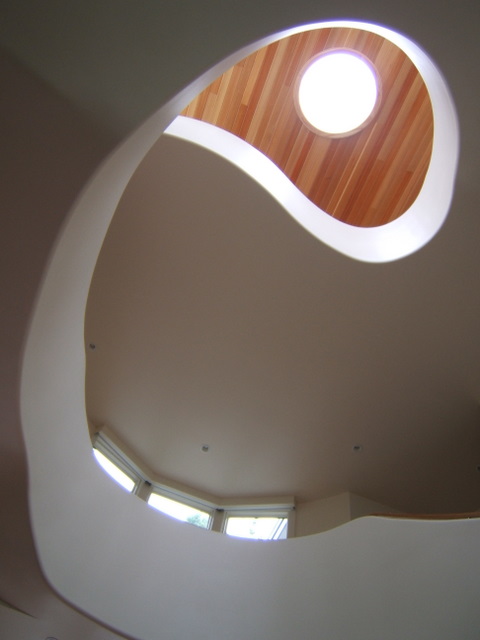
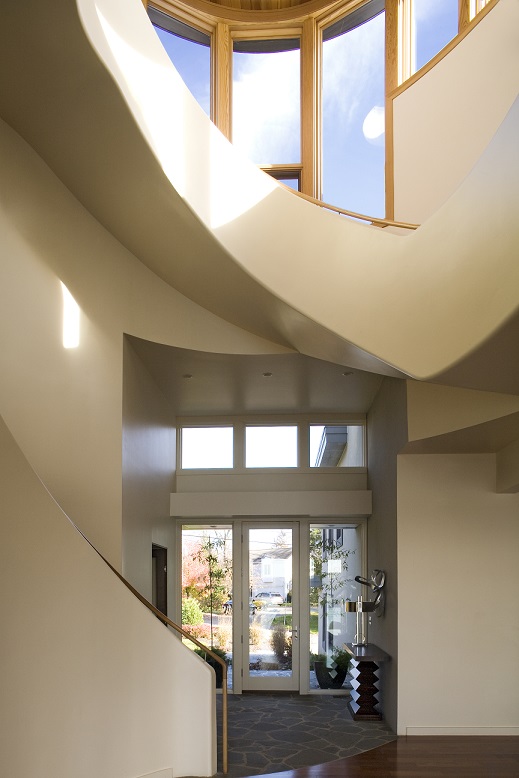
The photo above was a Low-Angle Shot of a gorgeous custom staircase built in one of our clients homes. The above photograph gave the audience the feeling of looking straight up showcasing the built in skylight and unique curves of the three story staircase. This custom staircase featured a plaster half wall, round curved handrail and Brazilian Cherry stairs.

skylight2


Picture3

Picture6

With it’s extremely unique architecture and color scheme, this is one of the most memorable homes we have built.  It truly showcases why our company is different, as well as our desire to reach and exceed each clients expectations.

Rear of the home

Upper Deck

You can view more pictures on our website: http://www.lundbergbuilders.com/portfolio-index.php

-Brittaney

Helpful Summer Home Maintence Tips

With the change of each season comes a new set of maintenance tasks for your home. Now that summer’s here, you’ll want to prepare your home and yard for the onslaught of summer heat. From air-conditioner upkeep to simple grill maintenance, these simple chores will help keep your home happy and healthy. By keeping your home properly maintained, you can lessen the risk of damage and also safeguard the well being of your family.

Energy Efficiency is always a top priority as the temperature increases, to increase energy efficiency in your home try these tips:Picture1

  • Dust your ceiling fans and balance any wobbly blades by tightening loose screws.
  • Use a fan only when you are inside the room. A fan doesn’t change the temperature of the room, but instead just cools you down.
  • Check your windows and doors for air leaks and cover with weather stripping or seal as needed.
    • Expert Tip: Use a small paintbrush or toothbrush when cleaning windows to get to hard-to-reach areas.
  • Replace your light bulbs with compact fluorescent bulbs. They burn cooler and hence add less heat to the room in summers.
  • Remove any debris that has accumulated near the outdoor AC unit. Second, change any dirty filters that are inside your home
    • If possible, service your air conditioner by a repairman. Dirty coils and wrong charge will have an impact on performance and efficiency.
  • Check your furnace filter. Clean or replace if required. If your furnace filter is dirty, it slows down the airflow through the system and can create performance issues

Outside Maintenance:

  • Since your deck or patio will be getting much more use during these hotter months inspect them for potential hazards such as loose boards and protruding nails.
  • Clean out the gutters and ensure that water freely moves out your down spouts.
  • Give your grill a deep cleaning with these simple steps:
    • For gas grills, turn the heat up to high and let the grill cook with the lid closed for about half an hour. Allow the grill to cool and then brush it off with a grill brush. Wipe down the exterior with a damp sponge and a gentle cleanser. Clean the grill’s drip pans.
    • For charcoal grills, completely empty the grill and wipe out any ashy residue. Then clean it inside and out with hot water, a scrubby sponge and some liquid dish washing soap. Let the grill dry completely before using it again.
  • Add a layer of mulch to keep weeds down and help the ground retain its moisture in the heat.
  • Check your hoses and exterior faucets for leaks — even a tiny drip can add up to a big waste of water. Pinhole leaks in hoses can be covered up by winding regular electrical tape around the (dry) hose in overlapping layers.


 Remember (as with every change of season) to check all smoke alarm batteries! th

Garage Remodel and Spring Cleaning


Garages aren’t just for cars and storage anymore. Before beginning your garage transformation, ask yourself what your goal for this space is. A man cave, a craft space, play area for your children or even a dance studio are all within reach when remodeling your garage if you plan and coordinate properly. Even if you want to stick with the traditional use and use it for storage and parking, implementing a cleaning and remodeling strategy can drastically change the useability of your garage.

First things first Sort, purge and sort again.

Ask yourself these basic questions as you go thru the items in your garage:

  • Do I need this?
  • More importantly: Do I use this?
  • Is this something I can inexpensively replace?
  • Will I have the space to store this?

Organize three piles: trash, keep and donate and make plans on following thru to get rid of the trash and donate piles.

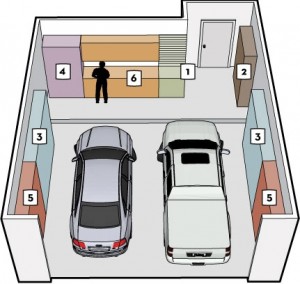
Next on your list…Zone the areas in your garage. If you do intend to use your garage for multiple purposes decide which areas you want to utilize for what. For example car parking zone, workshop zone, holiday storage zone, everyday item zone etc.

Garage-zones-numbered-image
http://www.easyclosets.com/blog/6-garage-zones-for-maximum-organization/

It isn’t necessary to use the exact demographic above but something similar can come in handy when deciding where to place things and what shelving and cabinets are necessary for implementing your vision.

Before placing items back in your garage or installing cabinets, you need to decide what to do about the floor. When considering flooring for your garage it is important to consider how you and your family use this space. Most consider their choices for garage flooring to be limited however there are several options that are convenient, durable and fairly inexpensive.

dur-a-flex-epoxy-colors
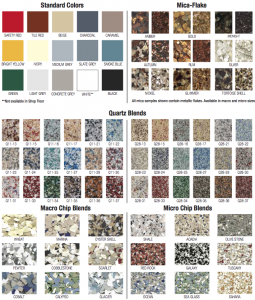
This chart shows the extent of the color choices and flaking that are available with an epoxy coating

1.In terms of durability, protection, and cost compared to the duration of the floor an epoxy coating is a very good investment. Garage floor epoxy is a durable, thick paint-like product applied directly over the concrete flooring.The finished product is actually 3 – 10x stronger than the concrete itself underneath. This type of coating is stain proof, water resistant, resistant to road salts and resistant to chips from dropped objects. Perfect for a garage right? A bonus is that this coating comes in tons of different colors and has several mix ins that can help make your garage one of a kind.  It can become more costly if the concrete in your garage is heavily cracked, damaged or wet, as this will need to be repaired before proceeding with application.

2. You could also choose to install tiles on top of the concrete. Scrubbing the concrete is necessary in order to allow the tiles to stick properly and stay in place. Garage floor tile is extremely durable, but if some tiles do get damaged it’s an easy fix. Instead of replacing the entire floor, you just need to replace the damaged tiles. Considering the extent of the colors, shapes and sizes that are available using this choice also gives you the opportunity to easily design a custom floor. The down side is that this option is one of the more expensive options compared to other choices available.

3. If your garage just needs a quick touch up, painting the floors can be a very inexpensive option especially if your garage is not used often. This option allows you to just supply a fresh look and is very affordable.

After the flooring you can decide on what cabinets and shelving is necessary for your garage. Adding custom cabinetry can give your garage a very high end look while making the space more functional. When choosing cabinets make sure that you choose ones that reach all the way to the floor unless you intend to store items underneath. Considering the durability, material and weight baring ability of the cabinets will also be useful since they will be used in a garage. Making this decision carefully will allow you to increase the lifespan of your cabinets.

Phased Construction Offers Reduced Upfront Costs and Greater Flexibility

Phased Building Plans

We’ve had a number of clients request our counsel on phased construction projects that break up a larger master plan for remodeling or adding-on into smaller phases. The reason for doing this is usually either motivated by the need to allocate a budget across a longer time horizon or the desire to continue to live in the home while construction is executed. If the home is undergoing a complete remodel that is not phased, often the homeowner will need to live elsewhere until the project is completed. While phased construction offers more flexibility, the following advantages and disadvantages should be considered.

bigstock-Mortgage-12269

Phased construction benefits the homeowner in allowing them to break up the costs of building across each phase rather than paying all at once. On the other hand, the homeowner will pay a higher total cost over the long-term. Another benefit of phased construction is that homeowners have time on their side, in terms of modifying the interior design of the home, once the initial shell structures are built. This can be an advantage, as homeowners sometimes have a hard time visualizing how interior space will work until they are standing inside the actual building shell. However, if significant changes are made to the architectural plan that require already built structures to be torn out and rebuilt, costs may increase quickly.

Building plans

THE PHASED CONSTRUCTION PROCESS:

Financing and Budgeting

Determine how much you can afford by speaking with your lender or financial advisor. Once you know what you can spend, you can ask the builder if what you have planned can be accomplished within your budget. You should also ask the builder to provide a cost comparison of building all at once versus phased construction. If you decide to move forward with phased construction, break out the costs over each building phase. This will allow you to work to a more specific budget for individual selections and finishes which will help you stay within the master budget.

Master Plan: The most important aspect of successful phased construction is in careful and deliberate planning. Working with a builder who has experience in phased construction is important criteria because it is a more complex scope of work than building all at once. The first step is to identify the project type, and create a list of needs, wants and desires to present to the builder so that they can design a master plan that meets your goals. Master architectural plans are then drawn up and discussed in detail prior to any work beginning.

Phasing Plan

Once the master plan is complete, the builder and homeowner can work together to designate how to break the project into individual phases. Attention should be paid to ensure the short-term need is on target with the long-term master plan. Permits will need to be planned according to the phased construction timeline. When phasing individual spaces, it is also advised to investigate the project in terms of the mechanical needs, material selections, and the finishes with regards to the master plan. Mechanical elements include all the large pieces of the master plan or “constants” that make up the mechanical (building envelope, HVAC), electrical, and plumbing. Ideally, if you can get the constants completed and the exterior shell “closed in” during phase 1, your home will look finished on the outside. This also gives a visual conception of the space thus allowing more time in making your selections for fixtures and interior finishes.

5 Tips for Successful Phased Construction

Work with the Pros: Work with a builder who has experience in phased construction design. They should have a clear and transparent plan that can help you navigate this complex process and deliver the quality final results you deserve.

Careful and Deliberate Planning: Phase 1 is the most important. Make thoughtful decisions to get as many of the details thought through before any building begins which will help identify the “constants” that costs the most to build, such as the initial building shell (floors and walls).

Ongoing Onsite Meetings: Make sure a weekly walk-through and meeting with the project manager and site supervisor is conducted during each phase so that any adjustments can be discussed. Don’t’ be afraid to get the clarity you need. Ask questions throughout the process, and continue to check that the short-term need is on target with the long-term master plan and budget.

Careful Budget Management: Understand how any changes will affect the bottom line of the master plan, the individual phase budget, and how they relate (in cost) to other phases of the build.

Setting Realistic Expectations: Consider the family dynamics ahead. How will decisions be made about the project, and identify the practical implications of daily living in a construction zone.


“Recipe” for a Great Custom Builder

Making the decision to build your dream home is not one made lightly. Typically, this is a process that homeowners think about over a long period of time, sometimes over the course of one’s life and their experience living in a less than ideal home. It is also a profoundly personal experience. Unlike other professional relationships, this one hits not just close to home, but in your home! So when the time finally arrives to be able to build the home you want, choosing the right company to build it is of paramount importance. Below is a “recipe” for success in evaluating and selecting whether a custom home builder has what it takes to build the home of your dreams.

Reputation – As the adage goes, “reputation is everything.” No promotional or marketing efforts can replace good, old-fashioned word-of-mouth referrals. We come by the majority of our work from past customers, and many of our projects are in serving happy repeat clients. Our Capital Readers Choice 2014 “Best Local Builder” and Best of What’s Up? Eastern Shore Reader Poll for “Home Design/Builder & Remodeling Custom Services” awards mean a lot to us because they are awarded by the voting public.

Experience – Choose a company that is established and experienced. You want to know the company you hire has been around the block and is financially stable. Longevity is proof a company knows how to run a successful business and that they can be accountable to you for work warranties. You also want a custom builder that can show a portfolio of work that demonstrates their skill across a full scope of building techniques and architectural styles. This means you can be confident in their ability to meet your expectations and achieve your unique vision.

Credentials -Whether you want to build a custom home with the latest in green building technologies, or to build a home that considers your needs as you grow older, look for a builder who has the industry “gold star” certifications that qualify them as an expert in building the home you want to build. Another relevant “c” word is “custom”. If you want a truly custom home, you want a builder that specializes in creating unique, one-of-a-kind, “heirloom” homes, not a production home builder that builds assembly-line style homes. Our certifications include: Graduate Master Builder, Certified Graduate Remodeler, Certified Residential Construction Supervisor x 2, Certified Kitchen and Bath Remodeler, Certified Aging in Place Specialists. We are also EPA-Lead-Safe Certified Firm.

Integrity – We are passionate about a job done right. Part of integrity includes professional values and reliable project and time management. We strive to help our customers make smart and educated decisions they will be happy with for years to come, and we complete our work within a reasonable project time table. We take great pride in doing what we say we will do. See what our customers have to say about our work ethic.

Personable – As the building of a home does not happen overnight, our relationships with our customers are important. The building of a dream home is at heart a deeply collaborative effort between the homeowner and our entire team, from our architects to our laborers. We like to think of ourselves as personable people, and we know that is the foundation for good communication. We are genuinely interested in each of our customer’s lives. Not just hearing, but really listening to our customers is a critical component to making their dream home vision a reality. That’s why the beginning of the Lundberg building process involves a one-on-one consultation with our team to identify what’s important to you– your lifestyle, aesthetic preferences, wish list– so that we can give you professional guidance in making the best decisions to honor your goals.

Economical – The clients that choose Lundberg Builders do so because we deliver the best value for their investment. We are neither the cheapest nor the most expensive custom builder in the area, but we are the best at delivering exceptional quality and craftsmanship for a reasonable price. We are careful not to waste money or resources, and we do not cut corners.

Explore our portfolio of custom homes on Houzz or contact us to schedule a free consultation.

Bridges on Kent Narrows

Bridges on Kent Narrows

Lundberg Builders, Inc. specializes in residential construction; however is not a stranger to commercial building. Bridges restaurant on Kent Narrows is one such commercial project. It is a local, island-inspired restaurant – bar & dock. 

Bridges has many unique features to lend to its upscale island flair, as well as allowing for breath taking views of the Chesapeake Bay year round. Inside you will find stained concrete floors, pickled Cypress paneling, Bistro style open kitchen, concrete countertops and hand-sewn conch shells incorporated into the bathroom tile. For the year-round views we installed two lift and slide Loewen glass doors and the LaCantina folding windows at the bar. 

Outside you will find Gorgeous Garapa decking. Garapa is one of the finest quality exotic hardwoods available that features a fine-grained timber that is light yellow to a warm golden blue. Garapa is naturally resistant to rot, decay and insect attack. It is naturally scratch resistant which allows the surface to remain smooth for many years without preservatives, making Garapa a perfect wood for exterior decking. 

Bridges on Kent Narrows

Established in 2010, Bridges was recently nominated for “Best New Restaurant” by the Restaurant Association of Maryland, along with being voted “Best Dock & Dine” and “Best View” by WHATS UP! Eastern Shore Magazine. 

It’s worth the trip by car or by boat to enjoy all that Bridges on Kent Narrows has to offer. They’re waiting for you. 

Bridges on Kent Narrows
Bridges on Kent Narrows »